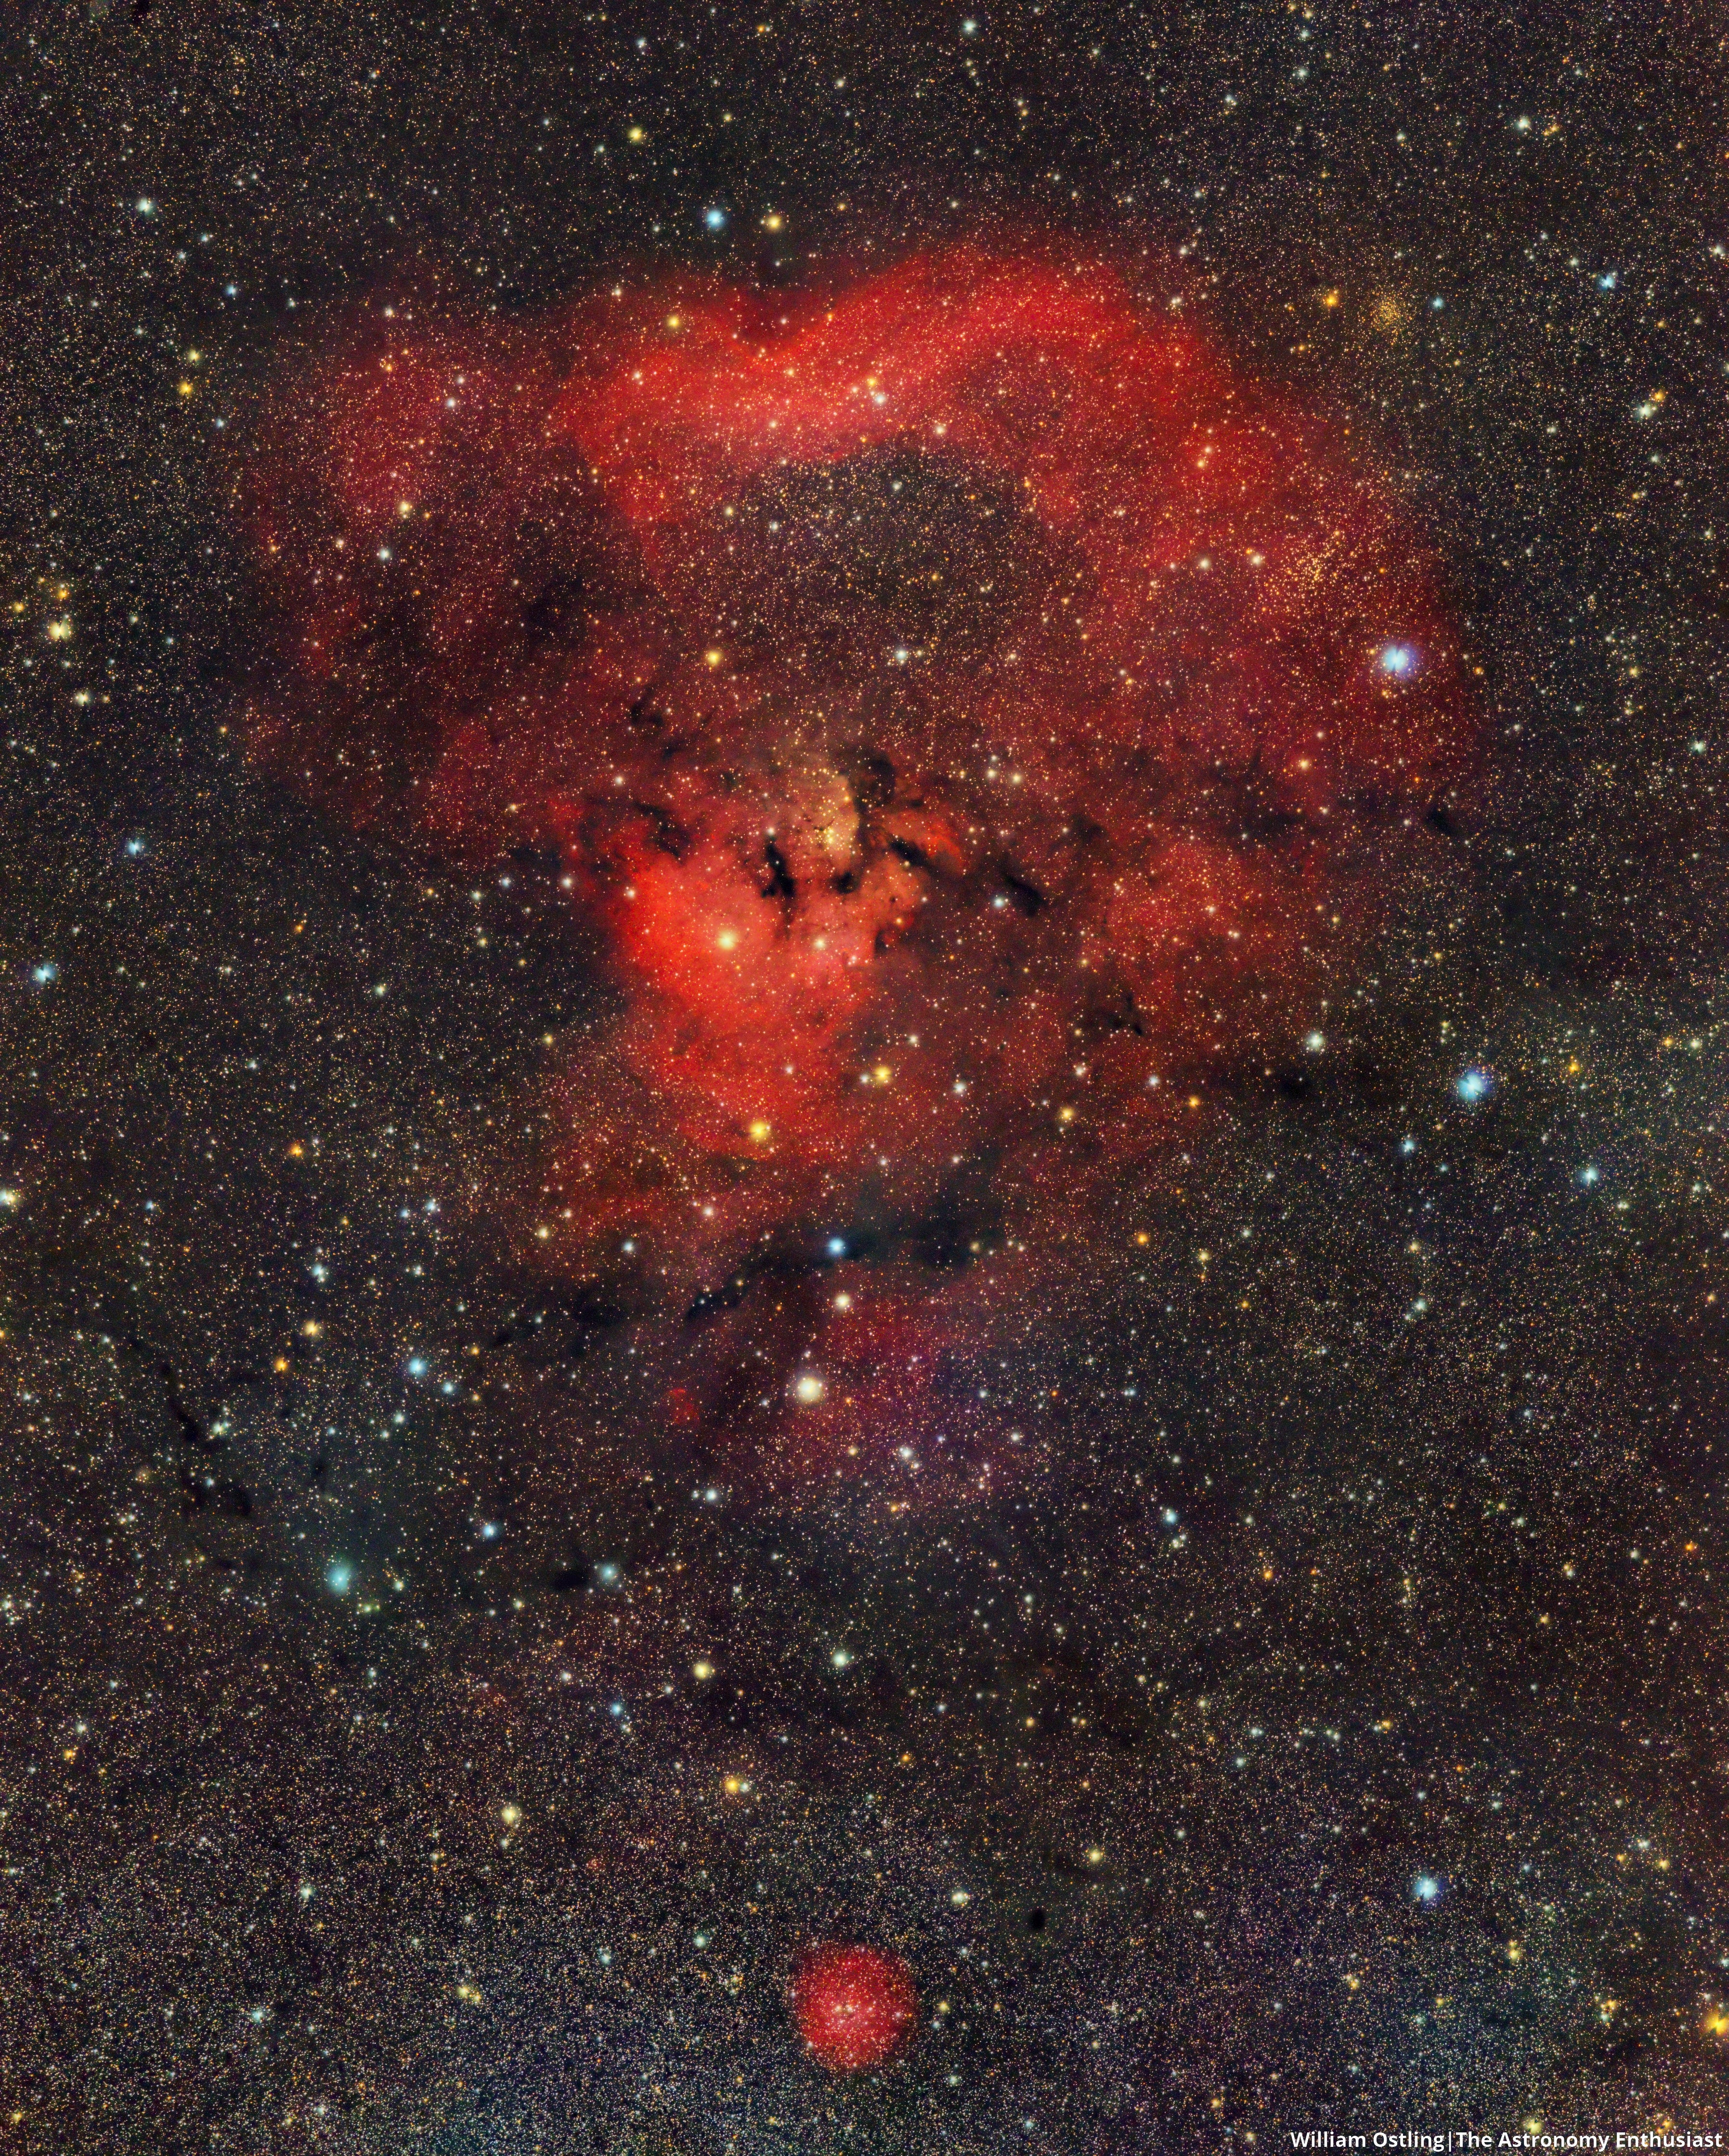
The Rosette is in full bloom in this collaborative image comprising more than 110 hours of exposure. The high exposure time also allowed for sharpening the image and increasing contrast to reveal fine features, like the wispy structure of Bok globules and dust across the top of the image. The center of the image displays the faint particle streams created by sulfur and oxygen gas blown away from the bright cluster of stars. Through the center of the image, faint wisps of glowing sulfur gas are visible above the dominant oxygen gas. Credit: William Ostling/Justin P./Jens Unger/Rob Olson/Dominic Annis/Amrit Prasad/Tommy Lease/Jay Aigner
I can still remember the night that marked the start of my journey into astrophotography. It was a clear and moonless August evening five years ago, and the year’s Perseid shower was at its peak. As I looked toward the north, I could see meteors streaking across the sky in bright lines. I raced back inside to grab my Nikon D90 and tripod, then pointed the camera in the general direction of the meteor shower’s radiant and simply took a couple of five-second exposures.
My setup was rudimentary at best. The only lens I had at the time was a 200mm telescopic lens — not exactly suited for wide-field shots! — and my tripod was about as steady as a wobbly restaurant stool. The results were even worse: The star trails looked more like zigzags due to my tripod, and I had only gotten one meteor in the frame. Still, that experience proved that I could start doing astrophotography from my yard.
Since then, I have never stopped trying to improve my images. Every new year brings huge advancements in hardware, software, and processing techniques that enable everyone to create better and better astrographs. My goal is to prove that even though it’s far easier to produce high-quality images with a monochrome, cooled camera, publication-worthy images can still be created with a DSLR and lens — it just takes a bit more time and care.
Getting started
As a college student who took several years of astronomy classes in high school, I’m quite familiar by now with the technical side of observing and data reduction. I know how to check what target to image using software like Stellarium, choose the imaging settings I need, and set up an observing run. Even when I started in astrophotography, thanks to my astronomy research, I was used to setting up sequences in the software suite Nighttime Imaging ‘N’ Astronomy (NINA) and I knew how to connect the camera, computer, and mounts. It was a bit of a pain to learn how to take flat calibration frames, but I was comfortable with the idea of a calibration pipeline.
The hardware side of astrophotography was a completely different beast to handle. At first, progress came quite slowly, but my need for perfection pushed me to constantly improve. After a few months with my new Sky-Watcher Star Adventurer 2i tracking mount, I quickly realized the unit had some limitations. Luckily, I had the tools and support I needed to take the entire mount apart, repair scratched gears and a loose clutch, and re-oil and optimize it.
Achieving and maintaining focus was also a big challenge for me. At the observatories I used for my research, I would just have to click a few buttons and the entire image would be in focus. But with my camera lenses, I found myself 3D-printing a Bahtinov mask and locking ring to achieve better focus and hold it in place.

The challenges of DSLR Astrophotography
Once I had familiarized myself with the basics of astrophotography and gotten comfortable with simple processing techniques, more difficult challenges of DSLR astroimaging began to appear, beginning with thermal noise. In longer exposures, hot pixels became more apparent, and the backgrounds grew increasingly blotchy. Dark frames only worked up to a point — once I started taking three- to four-minute exposures, they could not correct all of the thermal background glow.
I couldn’t figure out a processing workflow to fully remove that chrominance (color) noise, so I started to look for hardware solutions. I knew that the best way to reduce thermal noise in my images was to cool my camera’s sensor, so I began experimenting with ways to remove the excess heat. After a lot of trial and error, I came up with a method to blow cold air across the back of the sensor with a fan and tubes, ensuring that no vibration from the apparatus could interfere with the tracking of my mount.
But just as I solved one problem, another popped up in its place: the Bayer filter, which covers a camera sensor. The very filter that allows DSLRs to image in RGB (red, green, and blue — one color for each pixel) results in less detailed images with high-frequency chrominance and luminance noise over complex regions, and color artifacts in stars. I looked into many scripts and processing modules to try and remove these artifacts and noise in PixInsight. However, after a lot of careful research, I concluded that the artifacts caused by the Bayer filter were nearly impossible to remove using software alone.
Again, I investigated hardware solutions, this time researching ways to remove the Bayer filter from a sensor. I bought several used DSLRs to test different methods of removing the Bayer filter, including chemical solutions and washing or carefully scraping the filter off. However, the artifacts created by the residue left behind were impossible to remove using flat frames or software — which meant that even though the images were less noisy and much sharper, they were unusable.
In the end, to create the highest-quality images, I decided to get at least 50 hours of data per image, and only shoot wide-field scenes. That way, I could focus on revealing large, faint structures without having to worry about fine detail, which was perfect for the equipment I had.
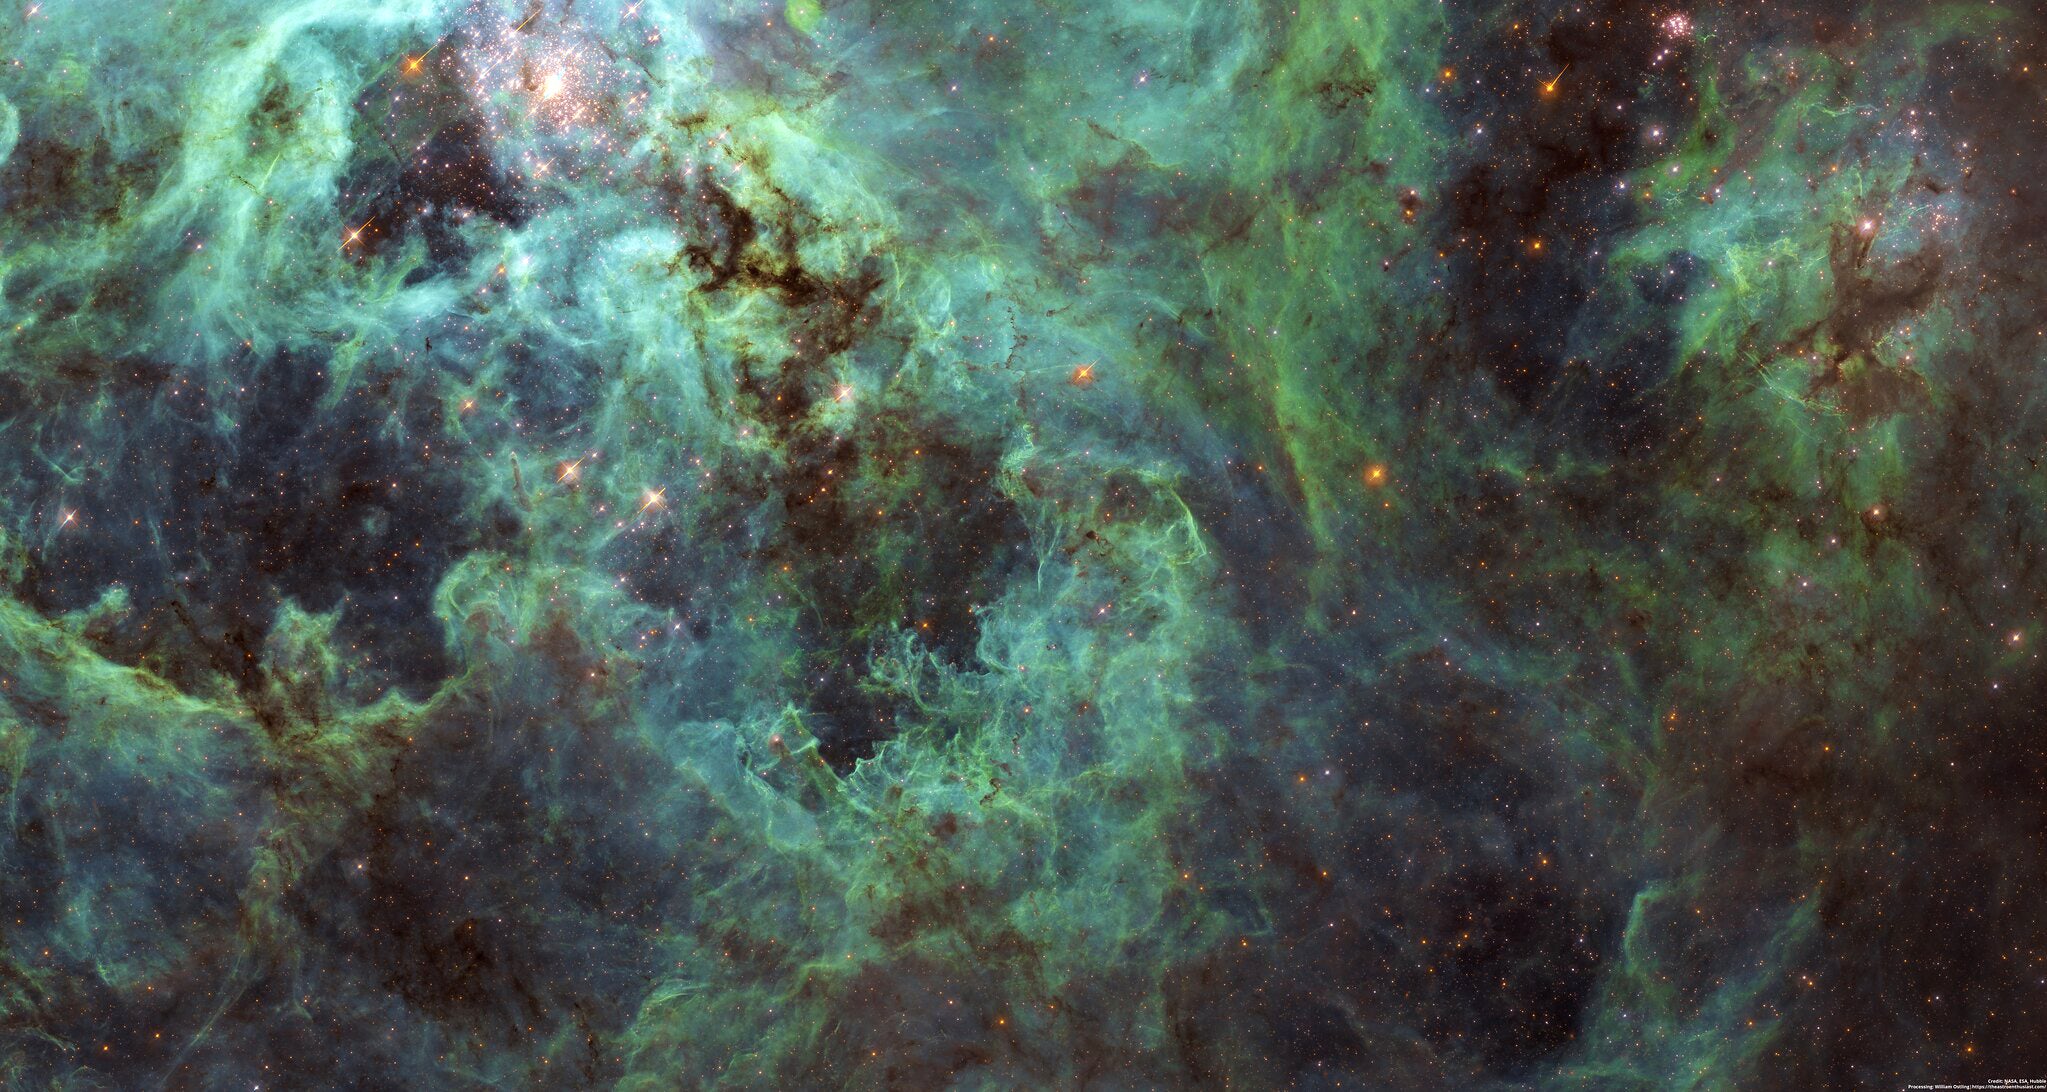
Credit: William Ostling/NASA, ESA, E. Sabbi (S
Hubble processing
Because I was spending so much time per object, I was only able to turn out one final image per month — at most. Though the images I produced were very low noise and high quality, the rate at which I was creating them didn’t quite scratch the itch of wanting to image different targets. As I got more restless, I decided to start processing Hubble data to improve my skills.
In many ways, Hubble data were the exact opposite of my data. Where I had low noise and low detail, Hubble had extremely high detail but very high-amplitude noise. This complete 180° shift in processing was exactly what I needed to improve. With fellow astrophotographers, I pioneered new algorithmic techniques that enabled me to preserve most of the detail while removing nearly all of the noise. And because Hubble data have so many sensor-based artifacts, I learned how to deal with and remove banding and column glow artifacts.
Hubble data also offered me an opportunity to learn how to work with large images and volumes of data. With my DSLR, I had gotten used to working with one image at a time and maybe the occasional mosaic. But because Hubble has such a small field of view, it was natural to work with mosaics with 50 panels, often resulting in 3- to 4-gigabyte images. Because running any processing on these images took hours at a time, I was forced to learn how to streamline my pipeline. My processing skills improved to the point where I was featured by NASA’s Astronomy Picture of the Day several times and asked to process versions of new observations. But by far the best thing about processing Hubble data was that I noticed a marked improvement in my DSLR images, allowing me to take on more ambitious imaging projects.
Collaborative astroImaging
As with most complicated hobbies, I couldn’t improve just on my own. The COVID-19 pandemic overturned many of the in-person communities that I had been a part of. But because I had to remain at home, I could explore the freedom to meet and collaborate with strophotographers not just in my neighborhood but across the world.
At the beginning of the pandemic, my astrophotography group was small, with about 20 of us chatting online. The group grew quickly as astrophotographers seeking a community found our Discord server, Friendly Cosmos. The leaders of this group — me, Steve Gill, and Jay Aigner — quickly realized the potential that each member could bring. Because astrophotography was (and still is!) a rapidly progressing field, our group aimed to provide a space where people of all skill levels could learn from each other and contribute.
We decided to hold two monthly competitions: a target of the month competition and a processing competition. The idea of the monthly target was to provide a single object to image, have the members of the astrophotography group show off their best effort, then vote on the winner. On the other hand, the processing challenge was to improve our skills and even the playing field in terms of equipment by providing a common dataset to work with. We all used each other’s experience and advice to improve our astrophotography.
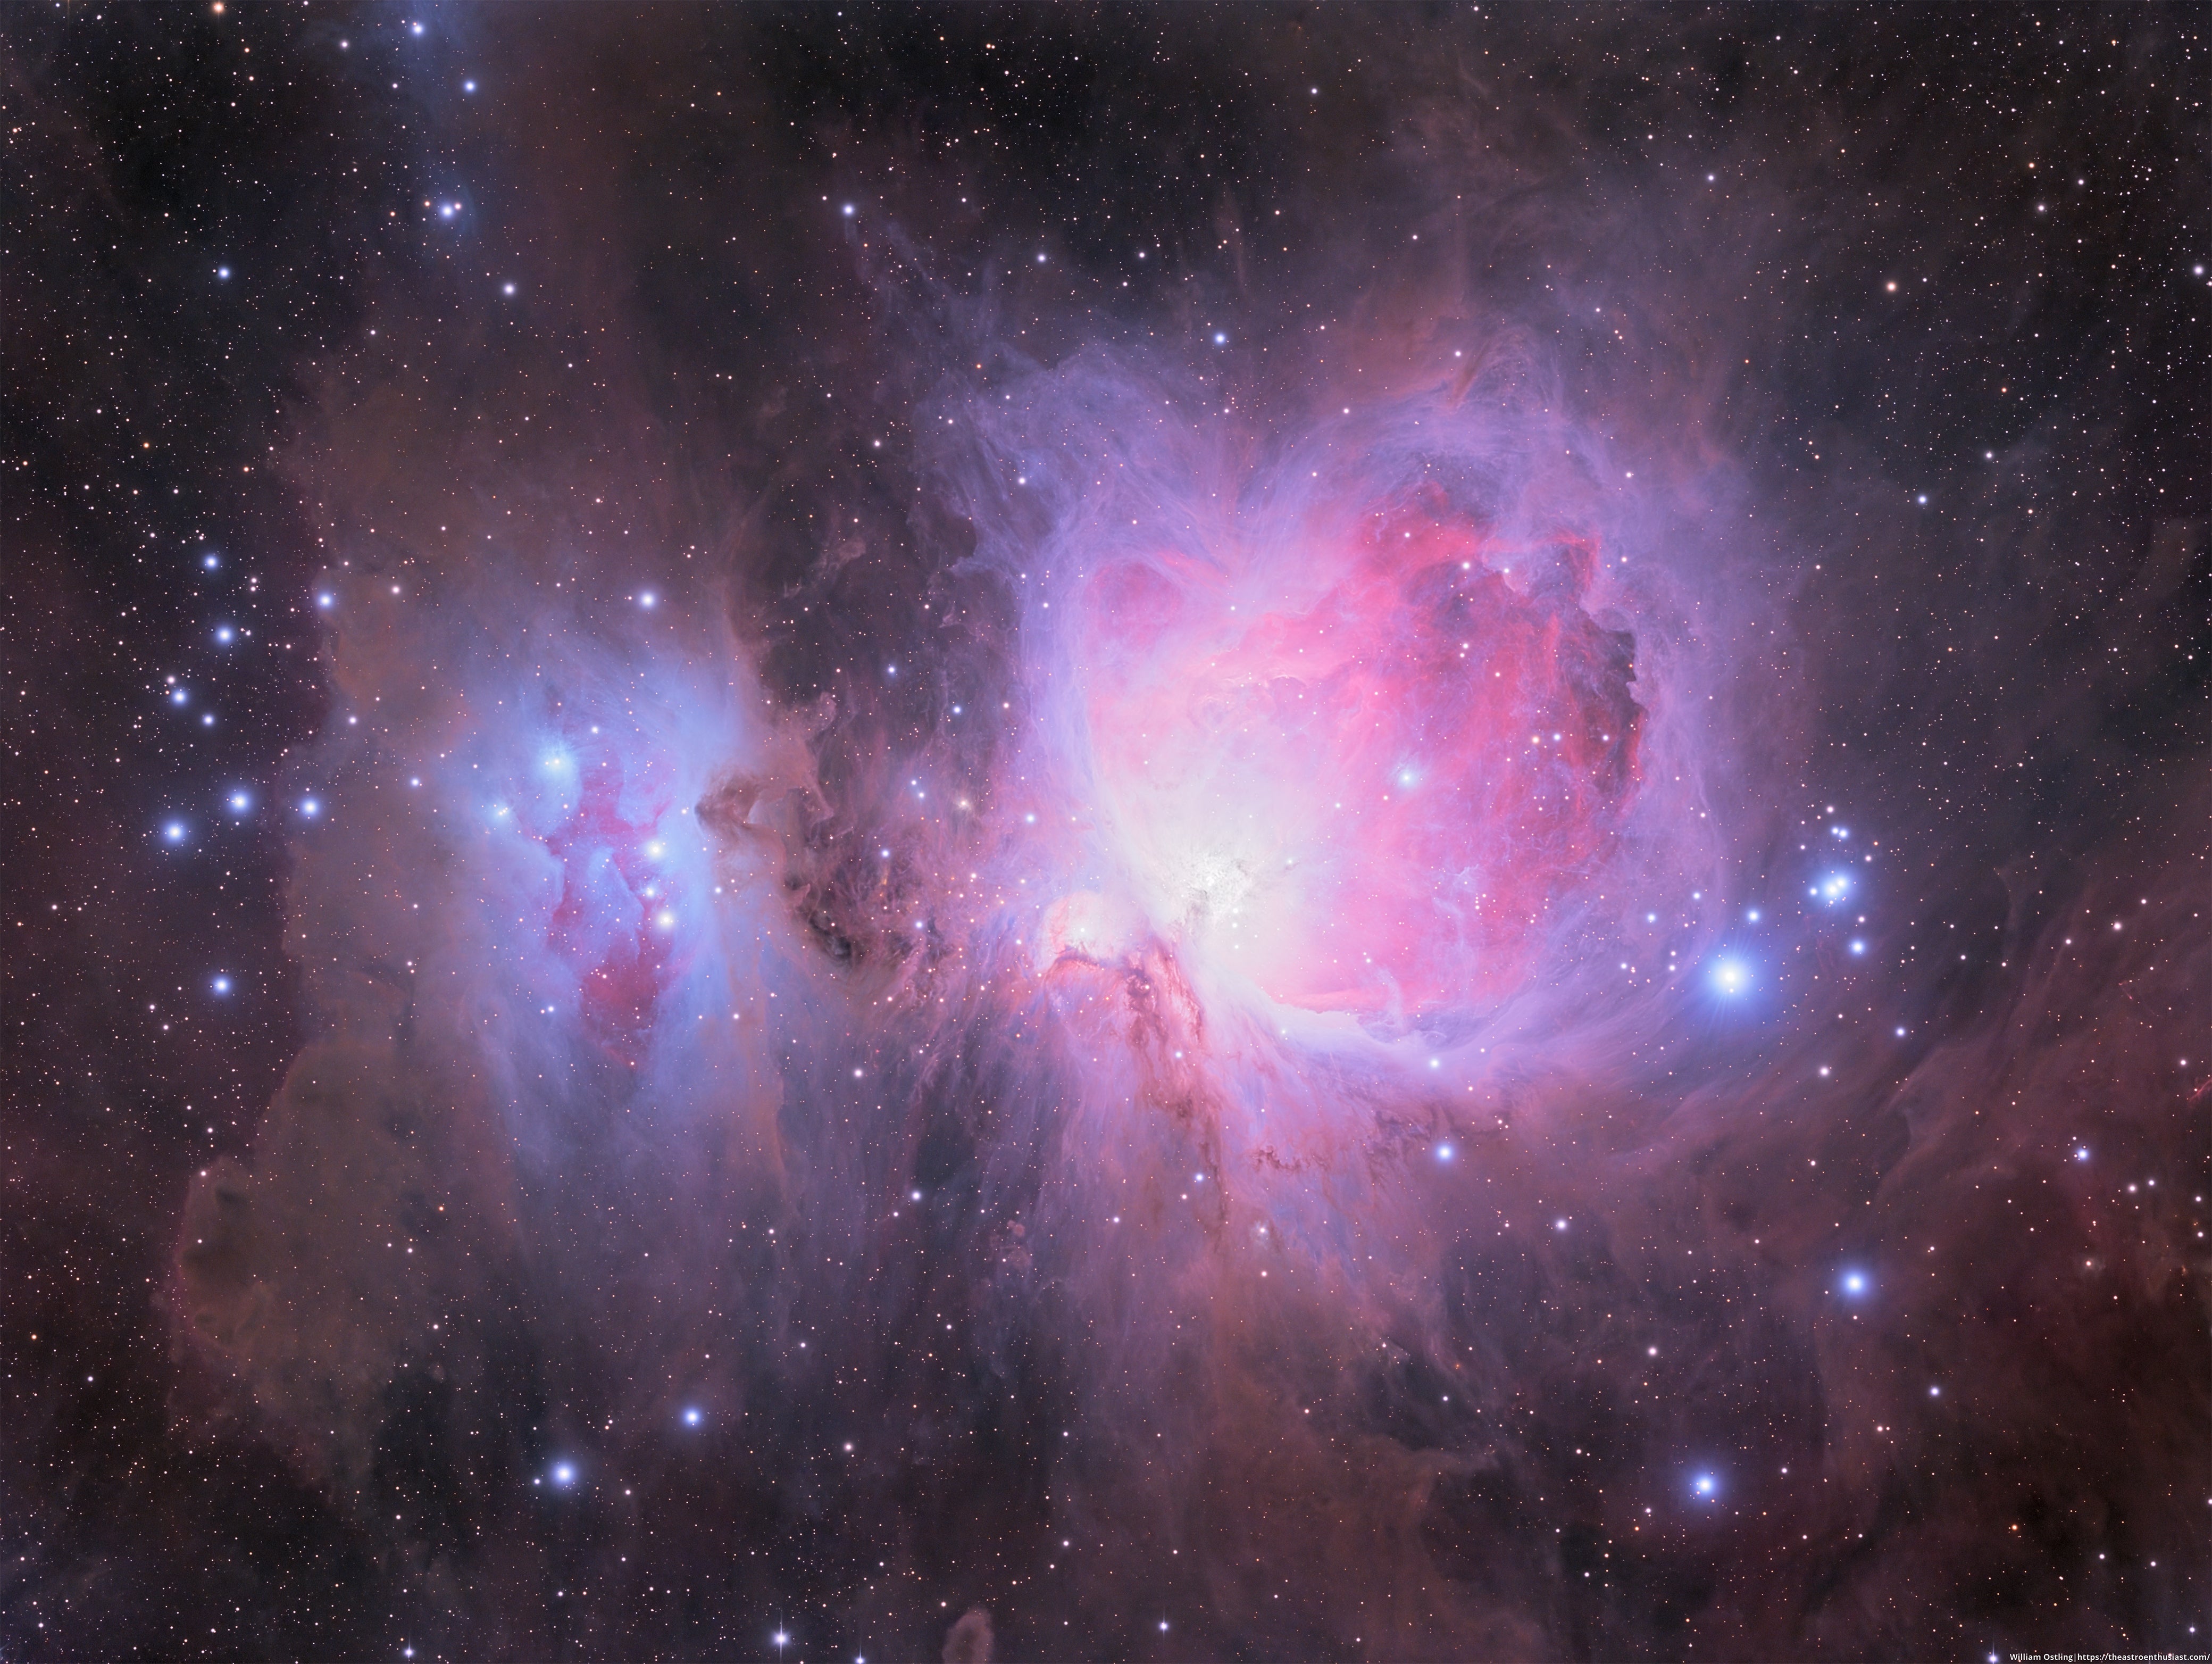
Credit: William Ostling/Justin P./Andre Vilhena/Dominic/Jens Unger/Steve Gill/Ovidiu Dascalu/W.J.G. de Blok et al. (2018)
Our first collaboration
Our skills progressed, but a new problem appeared: As the targets we tried to capture grew fainter and trickier, the time required for each image increased exponentially. The obvious solution was to collaborate by sharing data so we could produce better images. To prove that an astrophotography collaboration with more than five people was even possible, we decided to image a large, bright target: the Rosette Nebula (NGC 2237–9/46) in Monoceros. However, even that proved to be a huge challenge. Coordinating framing, planning sequences of images, and combining data across states and continents was uncharted territory and proved to be a big hurdle to overcome. Even figuring out how to weight subframes with completely different pixel scales creates huge mathematical problems.
Processing took a huge amount of time to finish as well. Not only were the images extremely large, but we all also wanted to create the perfect final image. With perseverance and hard work, though, we were able to create our first image from 150 hours of data collected from four continents. It took 23 iterations of processing to reach a final product that we all agreed was the best, but it was well worth it. And that was only the beginning.
Improving collaborations
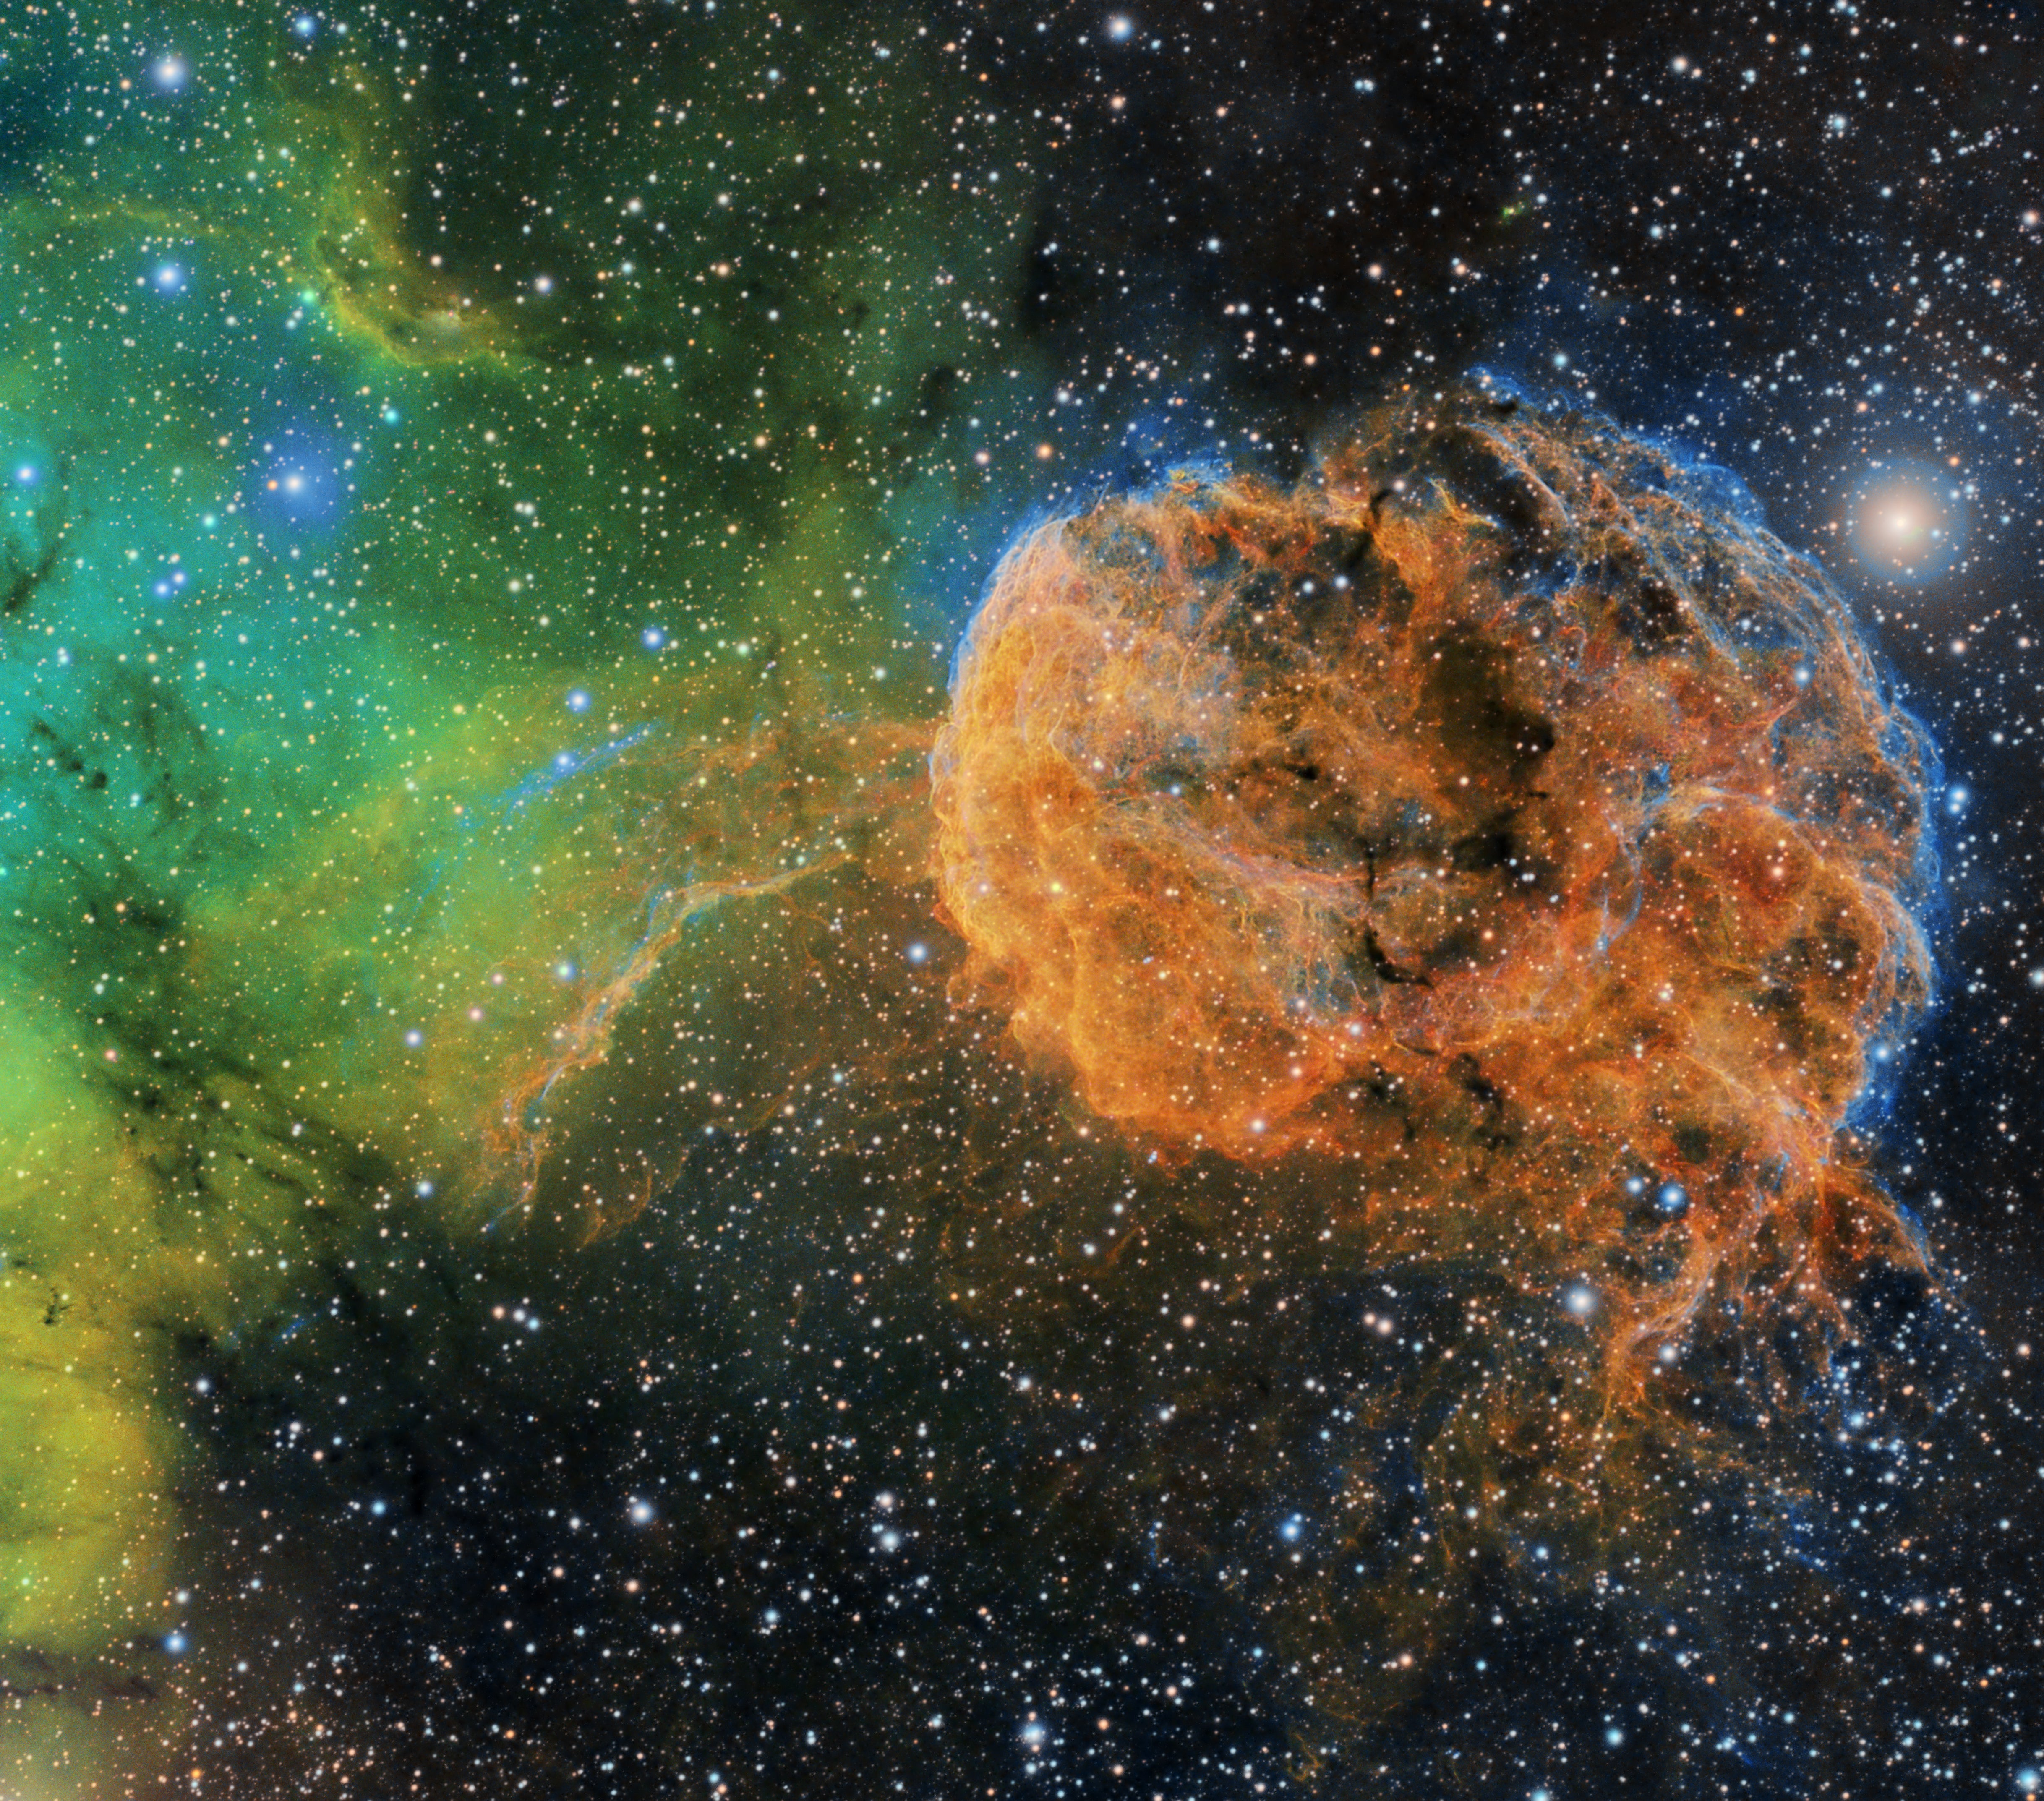
We tried again, focusing on a dimmer and more detailed target: the Jellyfish Nebula (IC 443), a supernova remnant in Gemini. This project far outclassed our first, as we collected more than 200 hours of data from 10 astrophotographers. We were able to reveal details never shown before, including the extent of the shock waves from the stellar explosion and the escaping filaments caused by changing magnetic fields. Our work was even recognized by NASA’s Astronomy Photo of the Day site.
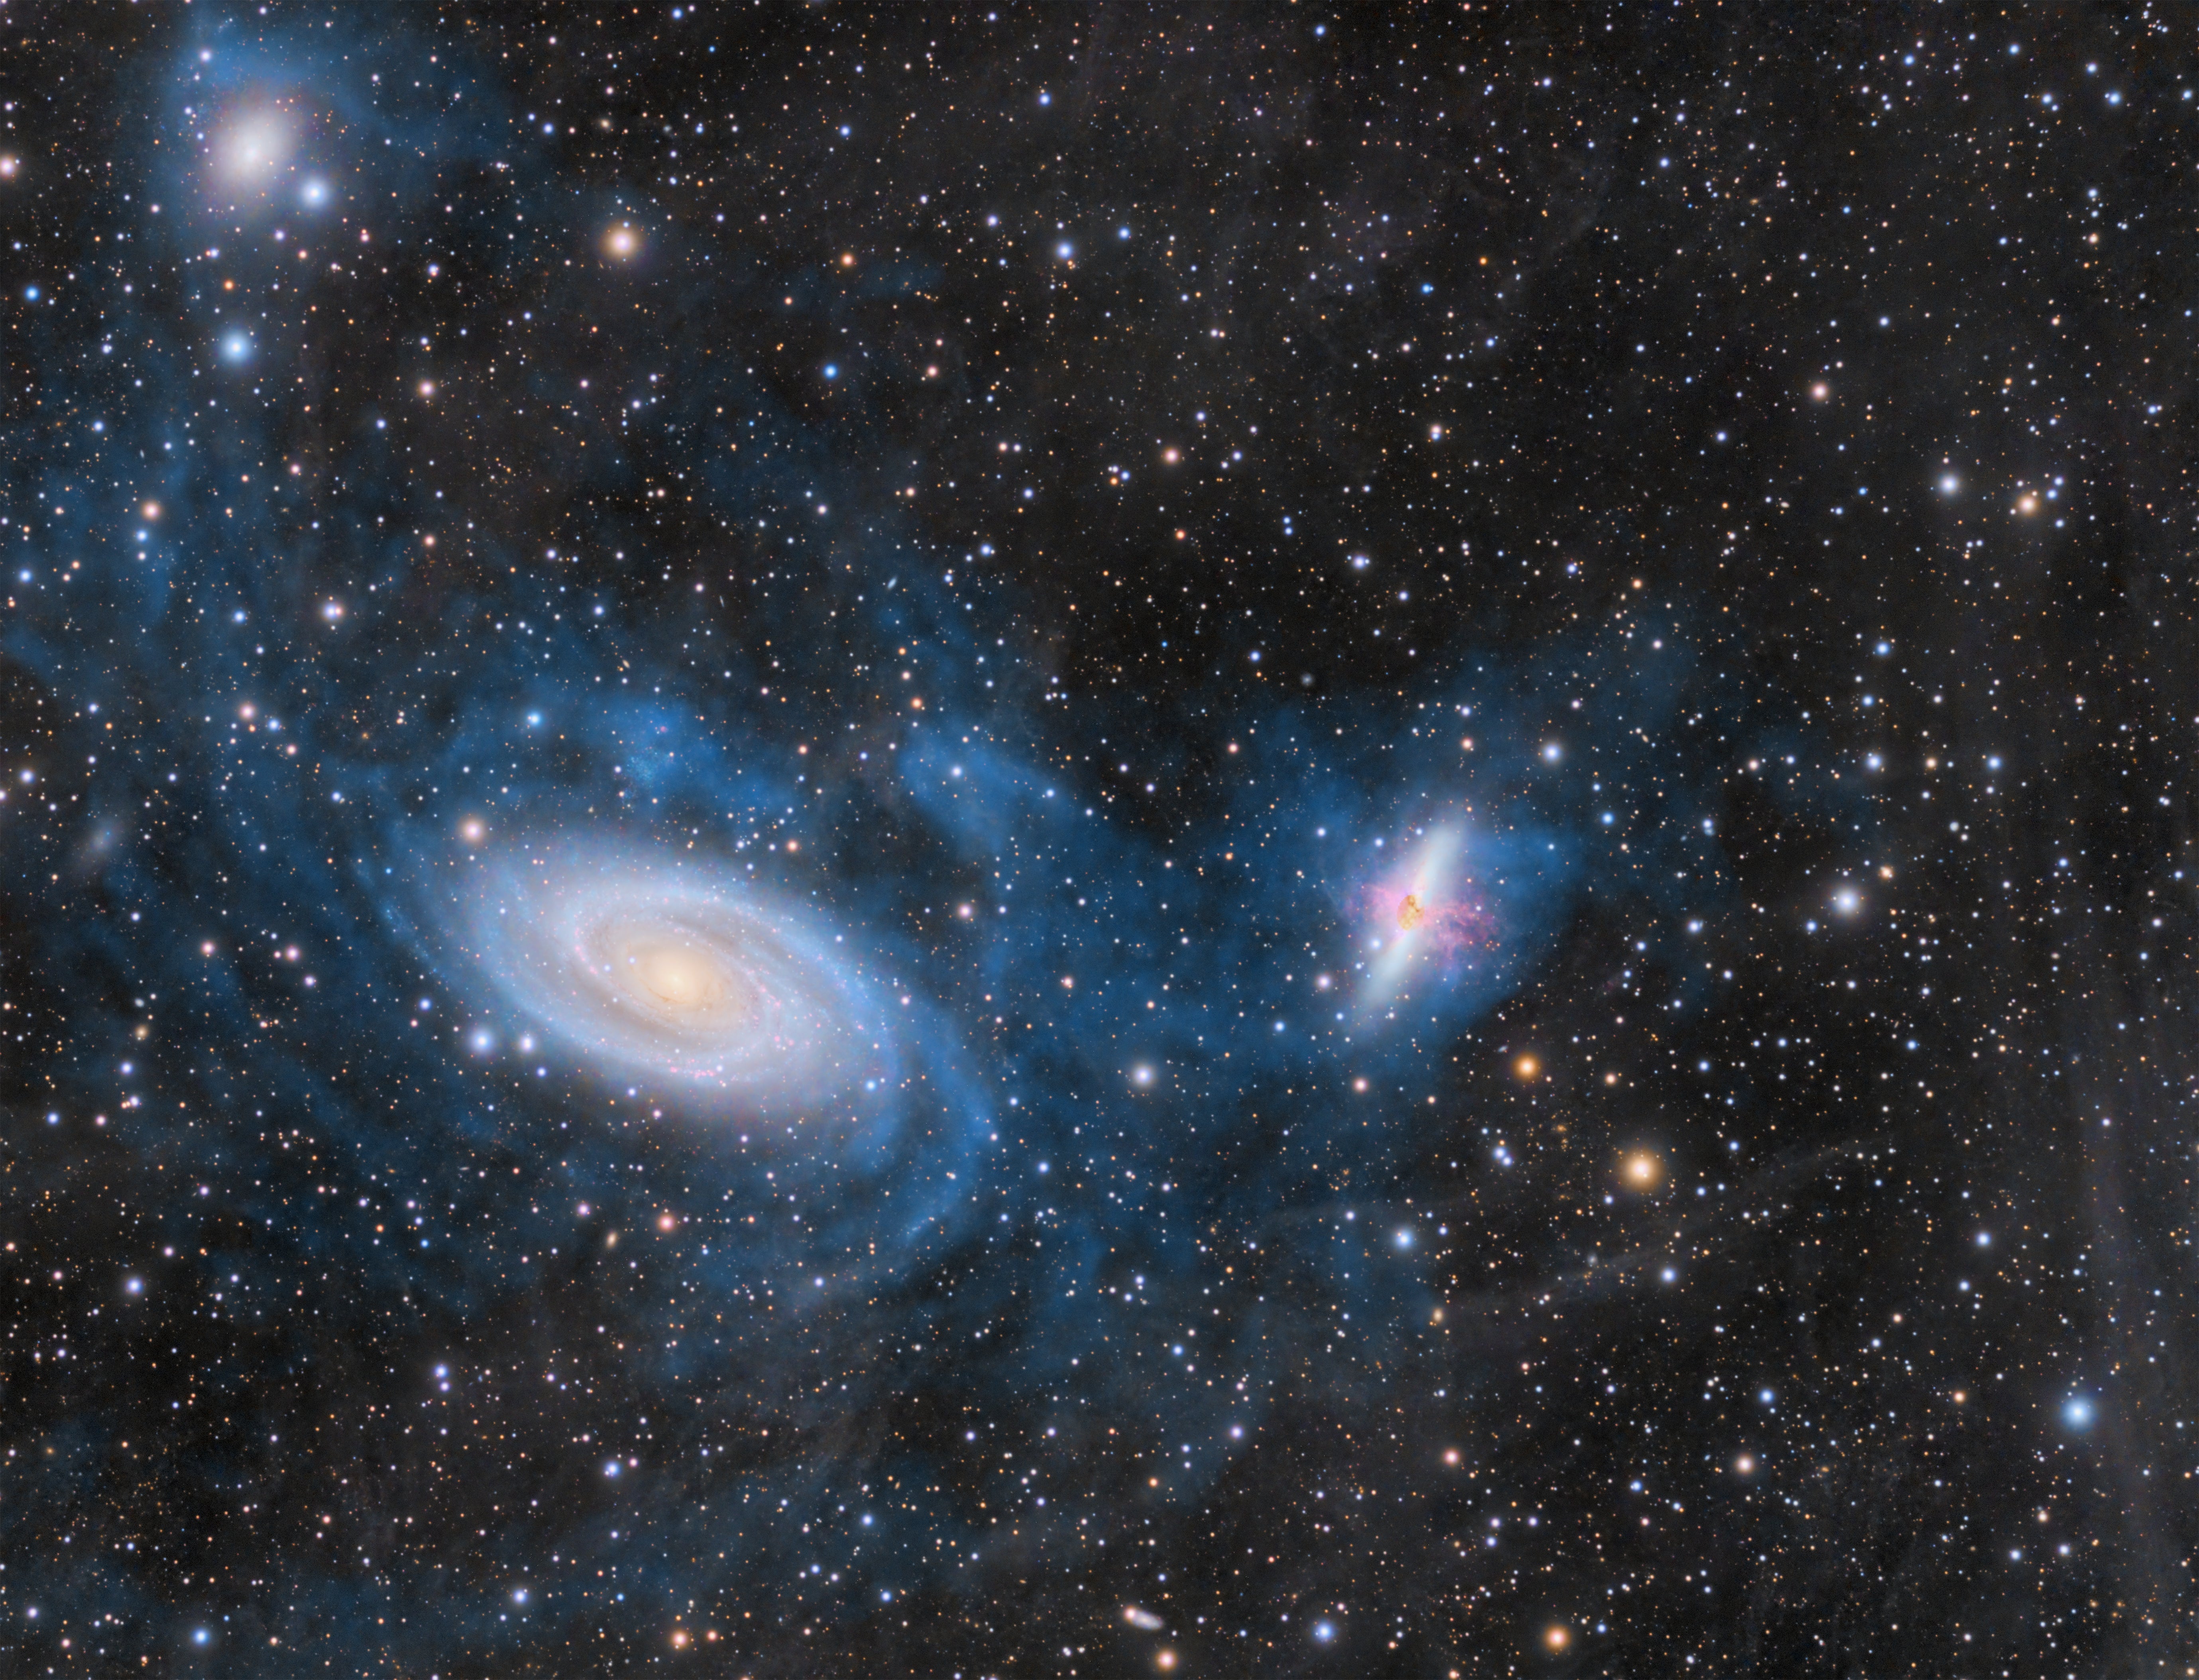
Having completed two narrowband collaborations, we decided to start a broadband collaboration. Our target was the interacting spiral galaxies of M81 and M82, with the goal of revealing as much faint dust as possible without sacrificing any detail. This collaboration was far more challenging than any of the previous images we had created. Not only did we decide to include one-shot color DSLR and Hydrogen-alpha data in our final image, but every image also had different gradients and artifacts that needed to be corrected and normalized. Additionally, the different pixel scales proved to be a much larger problem, as they created far more obvious artifacts.
We decided to adopt an avant-garde method to remove most of the artifacts with local normalization and selective drizzle. And to remove the complicated gradients throughout the image, we adapted what was then a pioneering method, multi-scale gradient removal.
The resulting image was a resounding success. It displayed incredible detail in the core of M81 and shock waves of M82, as well as huge amounts of galactic cirrus. We were also able to corroborate our observations with ground-based neutral-hydrogen observations of the surrounding region. Now, our group is working on a new collaboration to fully display the detail in the region surrounding the Lion’s Mane Nebula (NGC 2392).
Continuing astrophotography
As I immerse myself in the world of astrophotography, I continue to meet incredible people. This enriching hobby has been one of the most powerfully connective shared interests in my life. I’ve met extremely intelligent and diligent imagers who have not only taught me how to be a better astrophotographer, but also a better person. Though astrophotography seems like a niche subject, the skills I’ve learned under the stars and with my group also apply to everyday life.
Over the years, I’ve had my work shared by NASA, the SETI Institute, Earthsky.org, and many other astrophotography groups around the world. And I’ve also used my images to explain the research I’ve done and create more curiosity and interest in astronomy.
Through astrophotography, I’ve found a way to explore the expanse of the universe by myself and with others. I’ve found so much inspiration in capturing the beauty and detail of the cosmos and reflecting on the part I play in it. I hope that through this hobby, you can find that love of space as well.
Author: Space and Astronomy News
Maybe later